Building your own backyard putting green isn’t as intimidating as it sounds—I’ve nervously tackled this myself. Start by measuring your yard and picking synthetic turf or natural grass (synthetic’s way easier, trust me). Design a practical size around 500 square feet, map out three cup locations, and build your foundation with gravel and aggregate. Unroll your turf, secure the seams, set your cups, and commit to a maintenance routine that matches your surface choice. Stick with it, and you’ll be sinking putts in no time—each step builds on the last in ways that’ll surprise you.
Step 1: Scout Your Yard and Choose Your Surface Type

How much space do you actually have, and what’s your patience level for upkeep?
I’ll be honest—I learned this the hard way. Your first move is measuring your yard and deciding between synthetic turf or natural grass for your backyard putting green. Synthetic turf requires less maintenance and handles wear better, which appealed to me initially. Natural grass demands serious commitment: you’ll need a proper drainage system, crushed rock base layers, and USGA rootzone material.
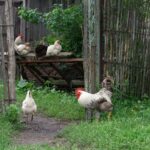
I started by sketching my available space. Most backyard putting greens run between 500 and 2,000 square feet—enough for practice without consuming your entire yard. Consider sun exposure and foot traffic patterns too.
Be realistic about maintenance time. If you’re not prepared for regular watering, fertilizing, and upkeep, synthetic surface type beats natural every time. Choose what matches your lifestyle, not just your golf dreams.
Step 2: Design Your Green’s Size, Shape, and Cup Layout

Where’d you find space on your property—that’s really the question that’ll shape everything else. I started with a level area roughly 25 square meters, sketching it out before touching a shovel. You’ll want something like a 15 x 14 ft rectangle, honestly enough room without feeling cramped.
Now comes the fun part: your cup layout. I placed three cups strategically across my putting green design to create varied lines and challenge myself. Space them so you’re not just hitting straight shots every time.
Don’t skip the fringe boundary—I used a 5×13 ft Bella Turf section nailed around my green’s edge. It defines everything beautifully. For slope planning, aim for 1-2% initially, then adjust toward 2-2.5% for proper breaks and speed.
Step 3: Build Your Foundation (Synthetic vs. Natural Varies Here)

Now’s when things get real—you’ve got to pick your foundation, and honestly, this choice’ll determine how much work you’re signing up for.
With synthetic greens, I’d start with 2–4 inches of gravel as your base materials, then add 6–8 inches of compacted aggregate on top. That’s it for the structural stuff. No drainage headaches. It’s straightforward, and honestly, I appreciated not overthinking this part.
Natural greens? They’re trickier. You’ll need proper drainage systems and specialized rootzone material underneath. I’ll be real—it’s more involved, but some folks swear the authentic feel’s worth it.
Pick synthetic if you want faster installation and less maintenance. Choose natural if you’re committed to the long game and don’t mind extra work. Either way, you’re building something you’ll actually use.
Step 4: Install Your Playing Surface

Ready to see your green actually take shape? Now comes the satisfying part—laying down your turf! I’ll unroll the pre-cut sections onto my prepared sub-base, leaving 16–18 inches of fringe hanging over the edges. Here’s where patience matters: I overlap the panels about 3 inches and secure the seams with a staple gun, keeping everything flush and tight.
Next, I grab my seam roller and work it across every connection, smoothing and blending until the surface feels uniform. Honestly, this step takes longer than I expect, but it’s worth it. For edging, I tuck the fringe under or backfill with aggregate for a clean boundary.
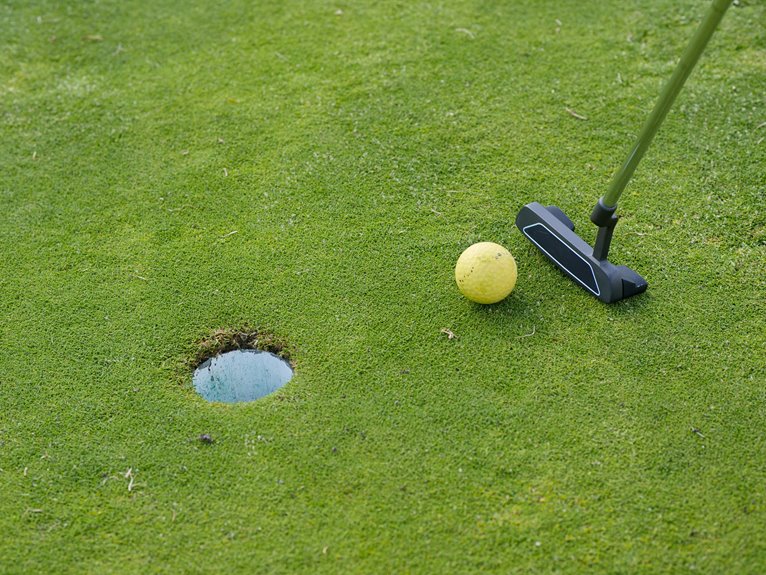
Finally, I mark cup hole locations, cut through the geo-textile carefully, and install cup sleeves with proper drainage. My ready-to-play surface is almost complete!
Step 5: Set Cups and Define Fringe Boundaries

Now that your putting surface is locked down, I’ll show you how to position those three cups strategically—I learned the hard way that spacing them out keeps things interesting and stops the greens from looking boring. You’ll want to define your fringe boundaries next, which honestly took me a couple tries to get right, but basically you’re creating that transition zone with nails every 3–6 inches that frames your playable area and adds challenge. Getting both cup placement and fringe definition dialed in transforms your backyard green from a flat practice mat into something you’ll actually want to play repeatedly.
Cup Location Strategy
Where should you actually put those cups? I learned the hard way that cup placement isn’t random. You’ll want to start with your basic setup—order those 3 cups and 3 pin flags, then test different spots with initial putts before committing.
Here’s what I discovered: strategic cup placement works best when you consider fringe boundaries and slope adjustments. I attach seam tape along the sub-base between green and fringe, then position cups where the final surface alignment feels natural. Those slope adjustments around rocks? They’ll influence where cups work best.
Think of it this way—your cups should follow the green’s personality, not fight it. Test a few locations, watch how putts roll, then decide. Trust me, this trial-and-error beats guessing.
Fringe Boundary Placement
Once you’ve got your cups positioned where they feel right, it’s time to lock in your fringe boundaries—and honestly, this is where things get real.
I’ll walk you through securing everything so your fringe stays put:
- Attach seam tape along the perimeter using 5-inch nails every foot—this defines your boundary and holds everything together
- Secure the perimeter with 3-6 inch nails around the edge, then add 1-inch staples every 3 square feet in the interior
- Space your interior staples strategically to prevent shifting during play
Here’s the thing: I used to skimp on staples and regretted it when my fringe started creeping. Don’t be like me. Take your time driving those nails and staples home. Your future self’ll thank you when your green stays pristine through countless rounds.
Playability and Variety
Transform your putting surface from a flat practice pad into an actual course by adding cups, pins, and real breaks. I’ll be honest—I didn’t realize how much difference this step makes until I installed my first cup. Now you’re creating friction points and defining playability zones that matter.
Start by ordering three cups and pin flags to mark hole locations. Space them strategically across your green to test different slope angles. I placed mine at varying elevations, which forced me to read the fringe and adjust my stroke for each shot.
Here’s what sealed the deal for me: watching how the ball’s roll changed near the fringe. Those edge boundaries? They’re not just visual. They create defined playing areas that transform your backyard into something genuinely fun and challenging.
Step 6: Add Infill and Shape Final Contours

How’d you feel when you first looked at your bare turf and realized it needed something more to play like a real green? That’s when infill changes everything.
I spread 0.5 to 1.5 pounds per square foot across my green, then raked it in thoroughly. Here’s what made the difference:
- Rake the infill evenly into the thatch for consistent blade height
- Level high spots with a course broom to blend seams seamlessly
- Shape final contours by adding extra infill where slopes needed adjustment
The infill works with your turf to support true roll and stability, especially after securing edges. I’ll admit my first attempt looked lumpy—but raking solved it. Your surface should feel continuous now, ready for real putting. This step’s where your green actually starts playing like one.
Step 7: Set Your Maintenance Plan (Based on Surface Type)

Your green’s taking shape now, and here’s the thing—all that work you’ve just done? It only matters if you maintain it properly. Your maintenance plan depends entirely on your surface type choice.
If you went natural grass, you’re signing up for daily mowing, irrigation tweaks, and regular fertilizer applications. It’s honestly a lot. I learned this the hard way.
But if you chose synthetic greens, you’re golden. You’ll mainly handle debris clearance and occasional leveling sand when needed. No chemicals. No mowing. No stress.
Here’s my honest take: synthetic greens let you enjoy your green without becoming its slave. Natural grass demands commitment. Pick your surface type knowing exactly what you’re getting into, then commit to that maintenance plan. That’s how you succeed.